
Setting a Preprocessor for Text to XML Conversion
When should the preprocessor be used?
When print output is formatted in a way that includes variably-sized blocks of data, the preprocessor can be used to enhance output that needs to be independent of the input page’s conversion. Ordinarily, variable blocks are line items with multiple detail lines.
When should the preprocessor not be used?
Already XML – The Print Output needs to be in text or PCL format. The Text to XML conversion accepts text as input. Source data in XML, PDF or image formats are not applicable to this process.
Too many pages – The Text to XML process keeps the working document in memory. Most systems will only handle a few thousand pages in a batch without problems. If the batch is too large, use an output-bursting project to keep the size reasonable.
Complete the following steps to use the Text to XML Converter:
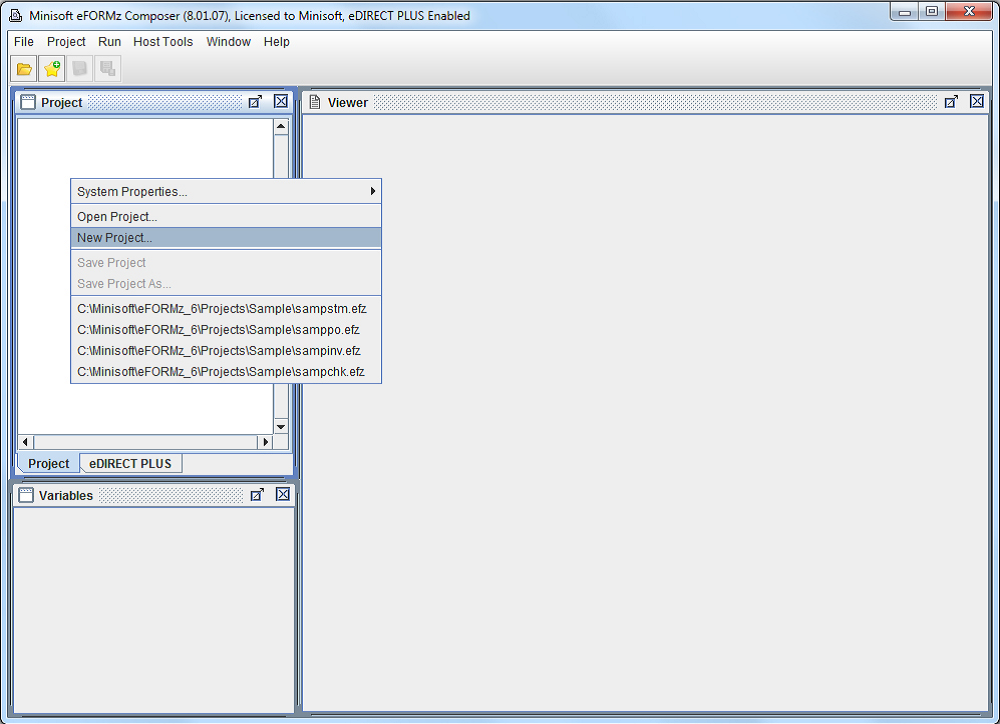
1. Create a new eFORMz Project by right clicking in the Project Window and selecting the New Project option.
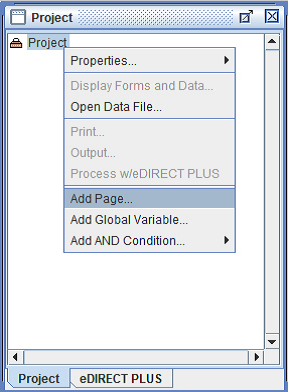
2. Next, right click the new Project name from the Project Viewer and choose Add Page.
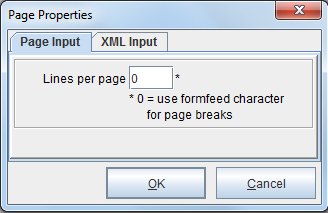
3. The Page Properties dialog box will display. Click OK to proceed.
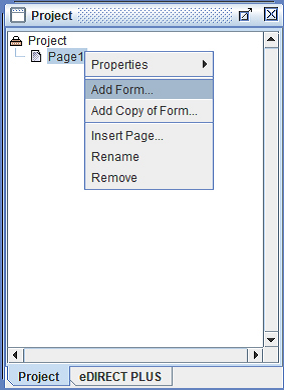
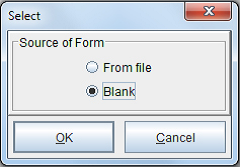
4. To add a Form, right click the new Page and pick the Add Form option. Select Blank.
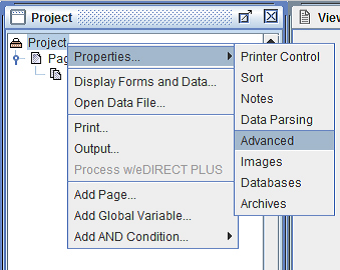
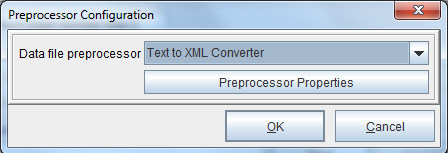
5. Right click the project and select Properties > Advanced. If you have Version 10.06 or later, right click the project > Add Preprocessor > Text to XML Converter and skip to step 9.
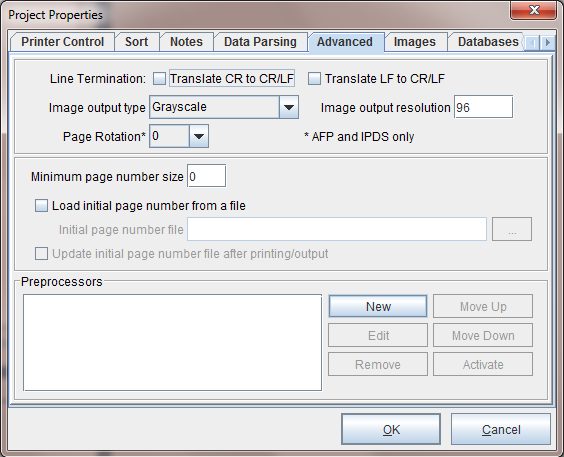
6. From the Advanced tab > Preprocessors section, select New.
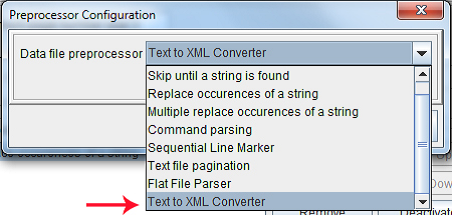
7. Using the Data file preprocessor drop-down menu, select the Text to XML Converter option.
8. Edit the Preprocessor Properties by selecting Preprocessor Properties.
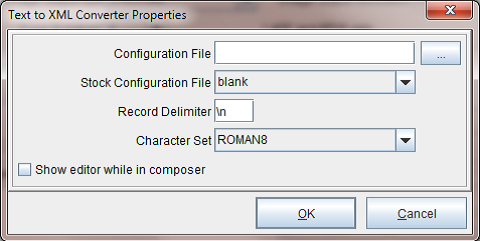
9. The Text to XML Converter Properties dialog box displays. Click Show editor while in composer.
Options Available:
Configuration File: The file to configure the initial settings of the Text to XML Editor. This is an optional parameter and can be left blank.
Stock Configuration File: A pre-existing file that configures the initial settings of the Text to XML Editor.
NOTE:
There are three stock options: RedPrairie Ship Confirmation, RedPrairie Order Confirmation and blank.
The RedPrairie Ship Confirmation structures the initial settings of the Text to XML Editor to handle a shipping confirmation generated by the RedPrairie Direct Commerce system. The RedPrairie Order Confirmation structures the initial settings of the Text to XML Editor to handle an order confirmation generated by the RedPrairie Direct Commerce system. These files can be modified with the Text to XML Editor, but by specifying the basic conditions, they can save the user significant time. Note: Default is blank.
Record delimiter: Separates groups of fields by specifying the boundaries of the data stream. Default is a linefeed (\n = new line).
Character Set: All numbers, letters and symbols associated with a given coding system.
Show editor while in composer: When checked, displays the Text to XML Editor in the eFORMz Composer (Window > Text to XML Editor). Default is unchecked.
10. From the Stock Configuration File drop down, select blank and then select OK.
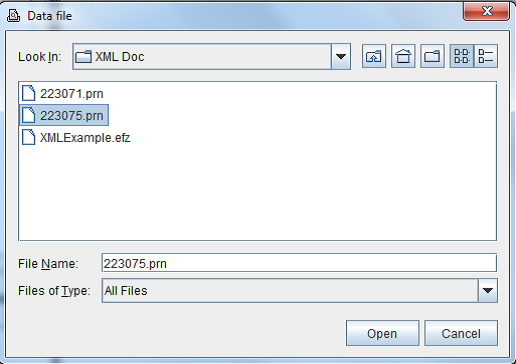
11. Return to the eFORMz Composer. Right click the Project and select Display Forms and Data.

12. Choose the file to convert to XML and click OK.
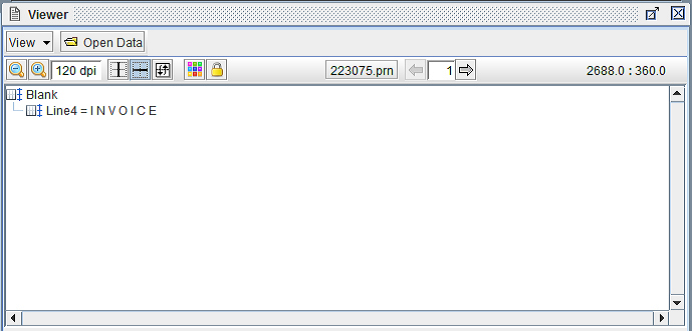
13. The file will display as an XML file format in the Input Data Viewer.
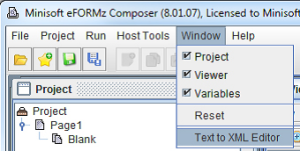
14. Once a given file has been converted, it can now be edited and configured for XML. To use the Text to XML Editor, go to to the Window menu and open the Text to XML Editor.
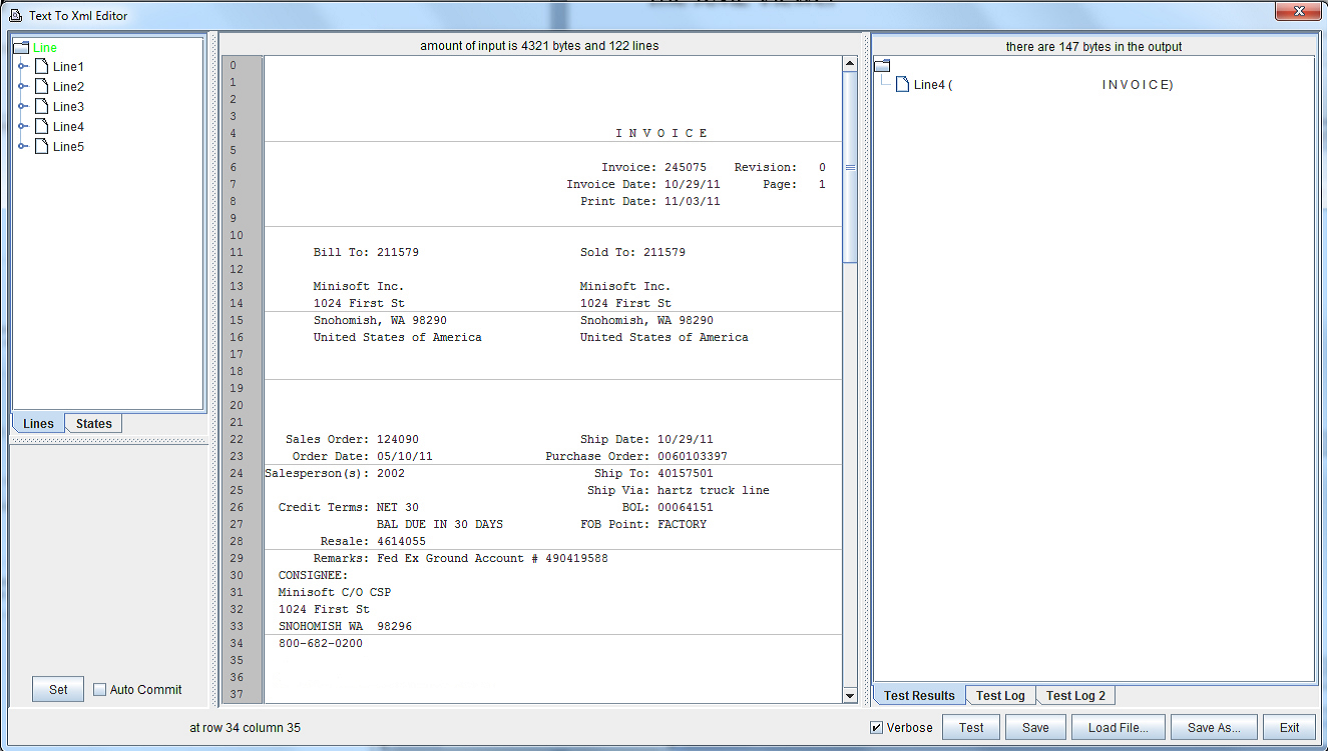
15. The Text to XML Editor opens in a new window.
 Related Pages