Output from eFORMz to a SharePoint archive
eFORMz can integrate with cloud-based document management and archiving services, like SharePoint. Listed below are some configuration details.
Configuration
Director Toolkit
To add an archive provider to eFORMz using the Director Toolkit, navigate to the eFORMz Main Menu from the eFORMz Composer, and select one of the following:
Host Tools > Local Director Toolkit (Windows)
Host Tools > AS400 > Director Toolkit (iSeries)
Host Tools > Unix > Director Toolkit (Unix/Linux)
Once the Director Toolkit displays, switch to the Archives tab and select the Add button.

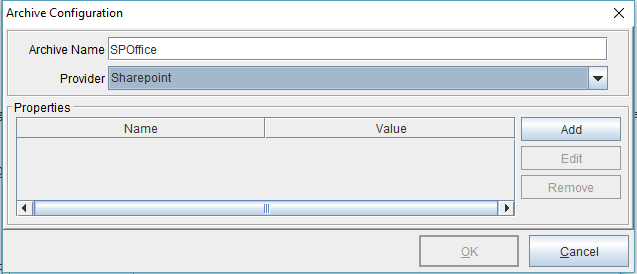
The Archive Configuration dialog box will display. Enter a name in the Archive Name field (‘SPOffice’ in this instance) and select ‘Sharepoint’ from the Provider drop-down menu. Next, select the Add button from the Properties field.
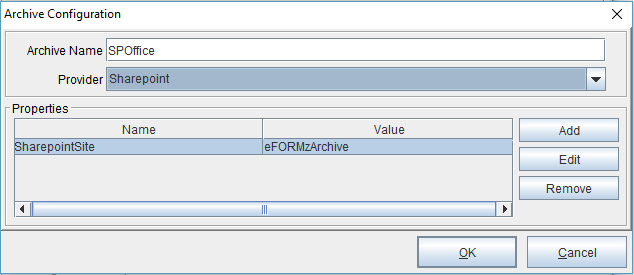
The Archive Property dialog box will display. Enter a value in the Value field to name the content within the archive (the folder name). In this instance, it’s ‘eFORMzArchive’.

The result will look like this:
Select OK when complete. Select Save before exiting.

Composer
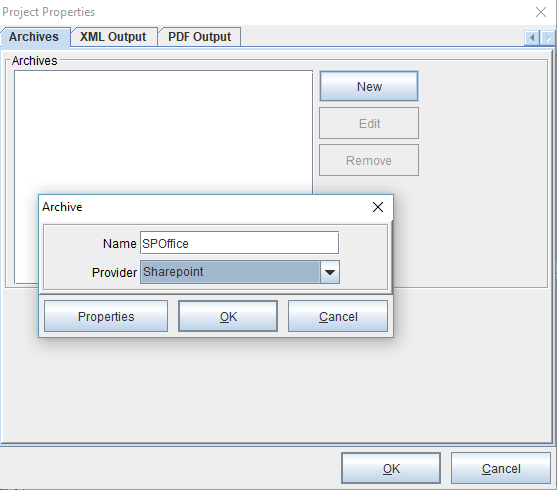
From the eFORMz Composer, right click the project and select Properties > Archives. Select the New button to the right. From the Archive dialog box, select Sharepoint from the Provider drop-down menu and name the archive (‘SPOffice’ in this instance).
The settings are as follows:
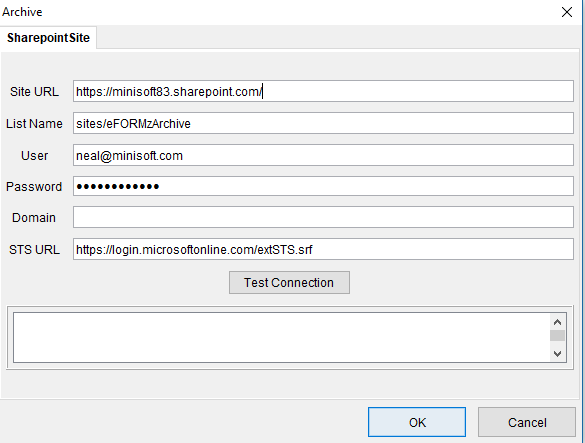
The Site URL is specific to each Office365 customer. The List Name is based upon the ‘site’ created for the files “eFORMzArchive”. The STS URL is the Single-Sign-On location for the SharePoint token.
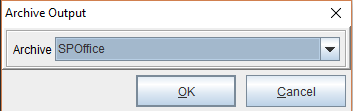
From there, navigate to the eDIRECT+ tab of the project window. Right-click and select Add Output > Archive. The Archive Output dialog will display. From the Archive drop-down menu select ‘SPOffice’.
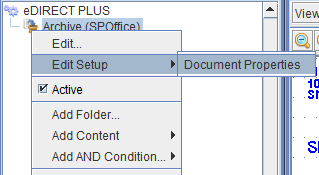
Next, right click the archive and select Edit Setup > Document Properties.
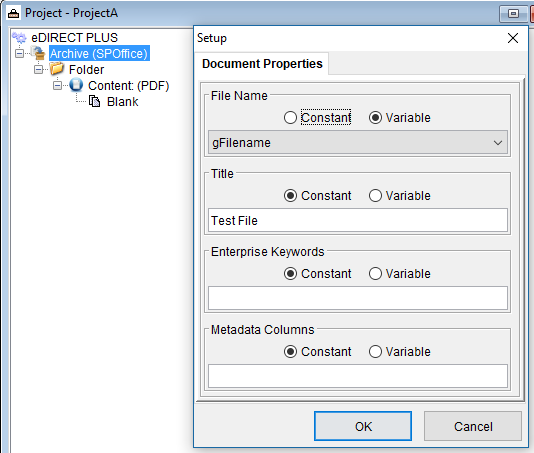
A File Name MUST be defined on the Setup page or every document will get the name “default”.
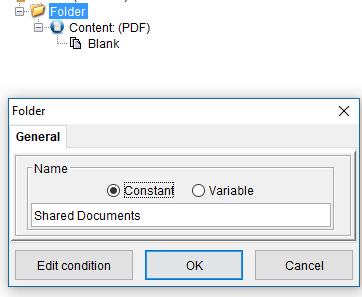
Right-click the Archive and select Add Folder. The Folder dialog box will display. In the Name field, enter a folder name. The Folder shown below is the default “Document Library” for any site. In this example, a folder named “Invoices” is used. Right click the folder and select Add Content > Generated to add the content to be archived (in this instance a PDF). Finally, right click the content and select Add Form(s). Select the form that will be archived.