
Using eDIRECT to print files to a certain location
To save files to your local drive without using archiving, simply print to file.
Video tutorial available:


Instructions
1. Navigate to the eDIRECT (or eDIRECT PLUS) tab from the Project window.
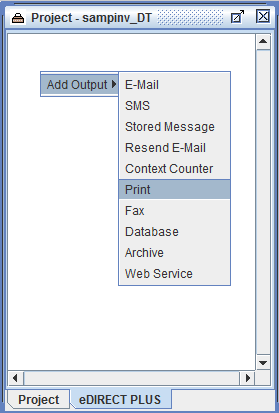
2. Right click in the Project window and select Add Output > Print.
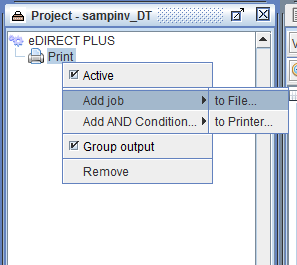
3. Right click the Print icon and select Add job > to File.
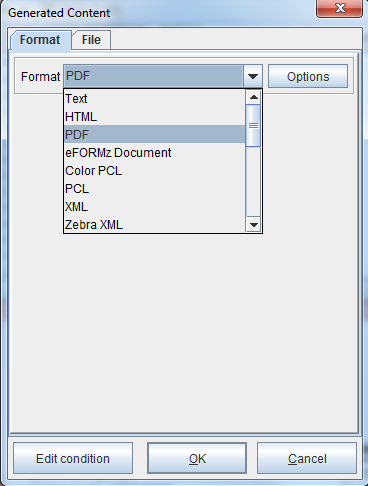
4. From the Format drop-down menu, select the file type. PDF is used in this example.
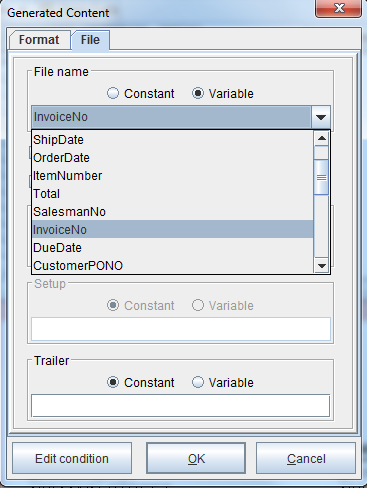
5. In the File name field, enter a constant value or select a variable from the drop-down menu.
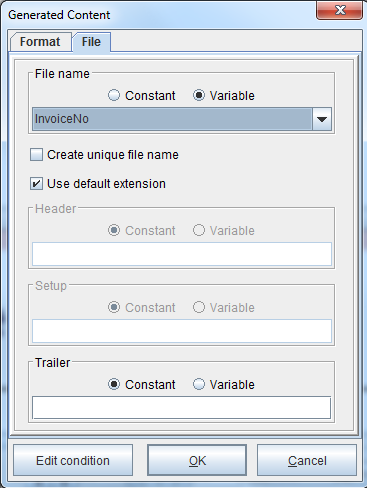
6. Check the “Use default extension” check box.
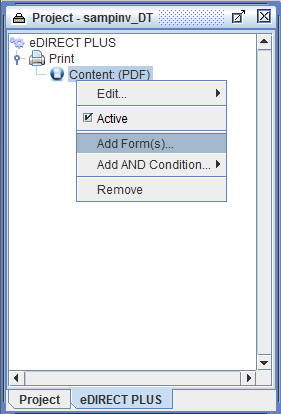
7. Right click the Content icon and select Add Form(s).
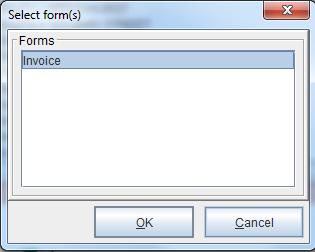
8. Select the form and click OK.
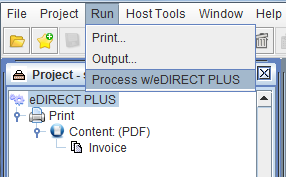
9. To test, from the eFORMz Main Menu, select Run > Process w/eDIRECT or Run > Process w/eDIRECT PLUS.
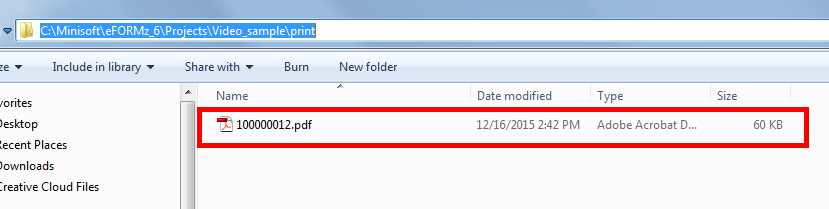
By default, the file will output to a subfolder called “print” in the folder that the eFORMz project being used is in.
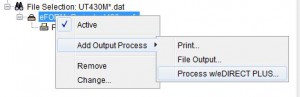
10. Update your Toolkit Configuration (.cfg) file to include eDIRECT processing. Right click the project > Add Output Process > Process w/eDIRECT (or eDIRECT PLUS).
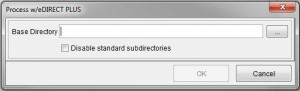
11. Specify the directory where you want PDF files for this step saved and click OK. The default is to store PDF files in the print directory under the directory that you specify. For example, if you specify C:\Public\PDF\, the files are stored to C:\Public\PDF\print\. To override this default, click Disable standard subdirectories.
12. Save your changes to the Toolkit Configuration file and restart the Director for your changes to be picked up.